
Crown Molding Installation
A crown profile has to look right at the line where the wall meets the ceiling.
Lakewood Ranch, FL
Trim installation in Lakewood Ranch can be as focused as replacing a plain baseboard or as coordinated as giving every room a common visual language.
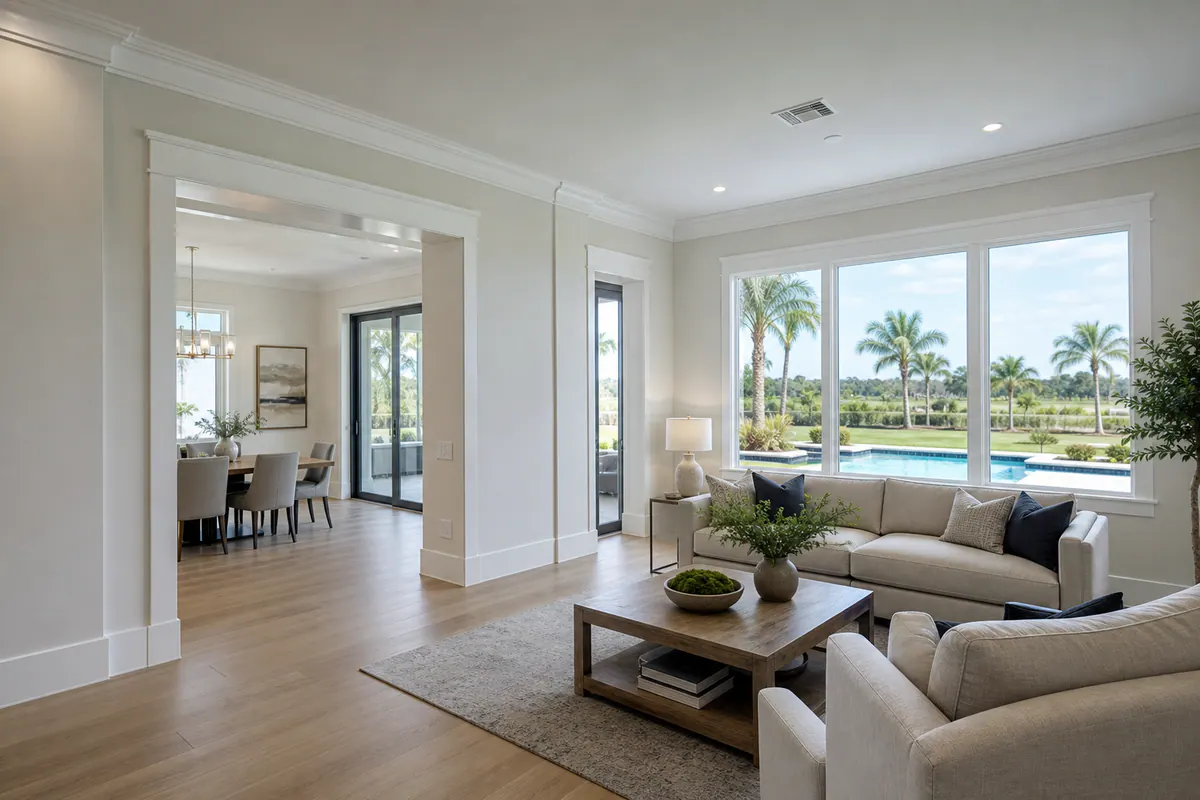
Trim installation in Lakewood Ranch can be as focused as replacing a plain baseboard or as coordinated as giving every room a common visual language. Trim installation covers the fitted finish pieces at floors, doors, windows, and ceilings: baseboards cover the floor-to-wall transition, casing frames openings, and crown creates a deliberate ceiling-to-wall transition. Replacing one worn or undersized piece can tidy an area, but it will not automatically make neighboring profiles, paint lines, and door openings feel related.
Finish carpentry is the broader design-and-detail work that brings those elements together. It may include crown molding, wall paneling, a restrained feature wall, custom shelving surrounds, or carefully built transitions where floors, walls, and openings meet. The aim is not to add decoration everywhere; it is to choose profiles and details that suit the room’s scale and the home’s existing architecture.
A considered whole-home approach starts with a shared hierarchy: baseboards that feel proportional to casing, casing widths that repeat at doors and windows, and crown or wall treatments used where they support the room rather than compete with it. Clean results show up in consistent reveals around doors, aligned profile transitions, tight corner joints, filled fastener holes, and smooth caulk lines before paint. For finish carpentry Lakewood Ranch homeowners can live with comfortably, those small visual decisions matter as much as the molding itself.
A phased update works well when one room has a clear design priority. A living-room feature wall, a more substantial fireplace surround, or new casing at a highly visible entry can establish the direction without requiring every room to change at once. The tradeoff is intentional separation: the finished room should read as a distinct destination, rather than as an almost-match to the hall outside it.
For open plans and adjoining spaces, replacing baseboards and casing together usually creates the calmer result. Sightlines often carry from the foyer through the main living area and into the kitchen, so a taller clean-lined baseboard stopping at a doorway beside narrow existing casing can make the transition feel accidental. Matching the profile, thickness, paint sheen, and corner treatment across those connected areas keeps floor and door transitions visually continuous.
A whole-home package is less about putting decorative trim in every room than setting a specification before work begins: which baseboard profile repeats, where casing changes or remains consistent, which existing door frames stay, and how new trim meets current flooring and wall paint. It is especially useful when rooms have different floor materials or recently painted walls, because those conditions affect whether removal exposes unfinished edges, leaves a paint shadow, or requires a planned touch-up area.
Residential trim installation Lakewood Ranch homeowners plan in stages can still feel cohesive when the first phase establishes the rules for later rooms. Keeping sample profiles, paint information, casing widths, and transition decisions prevents a future update from becoming a near-match. Whether the scope is one focal room or custom trim Lakewood Ranch-wide within the home, the strongest signal is deliberate alignment at openings, corners, and visible room-to-room breaks.
Profile choice sets the visual tone before paint color ever enters the picture. A square-edge baseboard has a crisp, flat face that suits clean-lined interiors; an eased-edge version softens that same outline with a small rounded edge. Stepped profiles add one or more recessed or projecting bands, giving the base of the wall more shadow and presence. More traditional profiles use curved or layered details and tend to read best where the doors, hardware, and ceiling treatments already carry that character.
Scale matters as much as style. Taller baseboards can anchor a larger room or taller wall, while a modest profile often feels more balanced in a compact bedroom or beneath lower ceilings. Door trim should frame the opening without making a standard-height door appear undersized. Wider casing can give a foyer or main living area a deliberate, architectural look; narrow, squared casing keeps a contemporary interior quieter. Window casing should generally follow the door-trim language, so adjacent openings look related rather than selected one at a time.
Existing architecture provides the final filter. A restrained square or eased-edge package can keep a newer, modern home cohesive, while a stepped baseboard and slightly wider door trim can add depth without turning every opening ornate. The goal is not the largest molding available; it is a proportion that makes the walls, floors, doors, and windows feel intentionally connected.
The ceiling line can either finish a room quietly or become a visible design feature. Crown molding is most effective when it gives the wall-to-ceiling transition enough definition to suit the room’s scale; it is less convincing when a large, detailed profile crowds a low ceiling or competes with already prominent cabinetry, beams, or lighting.
Narrow contemporary crown has a simple face and limited projection, creating a crisp shadow line without making a clean-lined room feel formal. It can work well in contemporary interiors, particularly when squared cabinetry, simple casing, and restrained hardware set the tone. A clean stacked or stepped profile uses layered flat bands rather than deep curves, adding more depth for transitional spaces while remaining calmer than traditional ornament.
Traditional crown molding typically combines curves, coves, and layered contours. That visual weight can suit a taller formal dining room, detailed fireplace surround, or cabinetry with raised-panel character. In a compact room with a standard-height ceiling, however, ornate crown may pull the ceiling visually downward. A simple painted ceiling transition, or a modest narrow profile, can leave the room feeling more open.
A coffered ceiling adds a grid of dropped beams and trim, making it a deliberate focal point rather than a substitute for crown. It generally works best where ceiling height and room size can accommodate its added depth. The right ceiling detail should reinforce the home’s architecture, not ask every surface to carry equal visual attention.
A feature treatment has the most impact when it gives one surface a clear job: framing an entry, anchoring a bed, adding order to a dining room, or giving a media wall a finished backdrop. Board and batten uses vertical battens over a flat wall to create a rhythmic, tailored pattern; a lower-height version can bring structure to a hallway or bedroom without taking over the room. Wainscoting keeps that detail to the lower portion of the wall, which can suit dining rooms and entries where a chair-rail-height transition feels appropriate.

Picture-frame molding creates shallow rectangular panels and tends to read more formal or transitional, especially when its spacing follows nearby doors, windows, and wall corners. Slat walls use closely repeated vertical strips for a more linear, contemporary effect and can give an office, bedroom headboard wall, or media wall visual warmth and direction. A painted accent wall is the quieter alternative: color supplies contrast without adding projection or pattern. For custom trim Lakewood Ranch projects, the choice should follow the room’s existing lines rather than introduce a competing style.
Built-ins take the idea further by combining storage and finish carpentry: shelves, lower cabinets, and a tailored surround can make an office, living room, or media wall feel integrated with the architecture. Their trim should repeat the home’s casing and baseboard language, while doors, shelves, and paint finish remain cleanly aligned. Strong finished details include consistent panel reveals, straight rails and stiles, filled fastener holes, and smooth paint-ready caulk lines.
The finish you want, and the conditions around the trim, should guide the material before a profile is chosen. A crisp, painted whole-home package calls for different priorities than a stained mantel surround or trim beside a frequently wet area.
Paint-grade MDF is often a practical choice for interior baseboards, casing, crown, and wall molding that will receive an opaque painted finish. Its uniform face suits clean, simple profiles as well as more detailed routed shapes, helping the finished paint read as one continuous surface. It is not a stain-grade material: a stained or clear-coated finish will not produce the grain and natural variation homeowners expect from wood. For MDF, clean seam treatment, filled fastener holes, careful sanding, primer, and smooth caulking matter as much as the profile itself.
Solid wood makes sense when the design calls for visible grain, a stained finish, or a detail that needs the character of a natural material. Wood can also be selected to coordinate with an existing stained door, stair component, or built-in. Its variation is part of the appeal, but it means boards should be selected and finished with the surrounding tones in mind; inconsistent grain or a near-but-not-matching stain can look more conspicuous than a coordinated painted package.
PVC trim may be considered where interior conditions bring repeated humidity or incidental water exposure, such as certain bath, laundry, or utility-area details. It is generally intended for painted finishes rather than stain. Its use should stay purposeful: matching a PVC baseboard or casing to adjacent MDF or wood requires attention to profile depth, sheen, and joint treatment so the transition does not announce itself.
Before a layout is finalized, walk each room with the existing conditions in view. Note where flooring meets the wall, whether old baseboards conceal uneven paint or gaps, and how straight the walls and corners appear. New baseboards can often be fitted around existing flooring, but the floor transition and the space left behind by removed trim determine whether the new profile will cover cleanly without making the perimeter look forced.

Door openings deserve the same early attention. Jamb depth, casing width, nearby return walls, and the relationship to window trim affect whether a chosen profile has enough room to sit comfortably. Record the exact baseboard, casing, crown, and wall-detail profiles alongside the paint color and sheen. A single approved sample prevents a bright-white semi-gloss casing from becoming an accidental near-match to softer wall paneling later.
A trim installer Lakewood Ranch homeowners work with should help turn those choices into a coordinated scope, not simply add ornament to every available wall. The strongest finish trim installation Lakewood Ranch homes receive is usually selective: profiles fit the room, transitions align, and the details support the architecture already there.
Review the Lakewood Ranch, FL service area for local planning context.
When you are ready, request a free estimate with the rooms, trim goals, city, and available photos.
Trim installation includes fitted finish pieces at floors, doors, windows, and ceilings. This commonly includes baseboards, door and window casing, crown molding, and clean transitions between flooring, walls, and openings.
Trim installation focuses on finish pieces such as baseboards, casing, and crown molding. Finish carpentry is broader and can include wall paneling, feature walls, fireplace surrounds, custom shelving, built-ins, and coordinated architectural transitions.
Square-edge or eased-edge baseboards usually suit modern interiors because they create a clean, restrained outline. Choose a taller profile for larger rooms or taller walls, and use matching simple casing at doors and windows for a cohesive look.
Yes, new baseboards can often be installed around existing tile, wood, carpet, or luxury vinyl flooring. The new profile must cover any gaps or paint lines exposed after old trim is removed while maintaining a straight, even floor transition.
Paint-grade MDF is best for opaque painted baseboards, casing, crown, and wall molding because its uniform face produces a smooth painted finish. Solid wood is the better choice for stained or clear-coated trim where visible grain and natural variation are desired, while PVC is useful in moisture-prone bath, laundry, or utility areas.
A crown profile has to look right at the line where the wall meets the ceiling.
Panel spacing, cap height, and the way trim meets a door casing determine whether the finished wall feels intentional or merely applied.
Cabinetry can be well made and still look unfinished if its edges stop abruptly at the ceiling, wall, floor, or open end.
Start with a visual checkpoint: a low-ceiling room can feel crowded beneath an oversized, layered crown assembly, while a simple profile can give it a clean, intentional finish.
Start with the transitions that need definition: where walls meet floors, openings meet walls, and walls meet ceilings. The selections for those points should read as one system across the house, not as isolated molding purchases.
Before paint closes the visual gaps, look closely at a door opening: the casing should hold an even reveal, the narrow strip of jamb left visible around the frame, and meet the baseboard cleanly at the floor.
Start with your city, rooms, trim goals, and any photos or drawings that can help clarify the work.