
Crown Molding Installation
A crown profile has to look right at the line where the wall meets the ceiling.
Osprey, FL
For an Osprey homeowner, trim installation in Osprey, FL can be a focused room upgrade, the finishing step after a remodel, or the detail that brings an entire interior into balance.

For an Osprey homeowner, trim installation in Osprey, FL can be a focused room upgrade, the finishing step after a remodel, or the detail that brings an entire interior into balance. Thoughtful finish carpentry gives walls, doors, windows, ceilings, and floors intentional stopping points rather than leaving each surface to meet abruptly. The result can feel crisp and tailored without making the home overly formal.
Proportion is what keeps the improvement believable. A taller baseboard can give a room with higher ceilings more visual weight, while a simpler profile may suit a compact bedroom or relaxed coastal interior better than layered, ornate molding. Door and window trim frames openings and helps align them visually; ceiling trim softens the wall-to-ceiling transition; floor-level trim conceals the joint where flooring meets the wall. Together, those details can support either a light coastal look or a clean transitional style.
Finish carpentry in Osprey, FL is also about how the existing home accepts the new work. Walls may not be perfectly straight, floors may vary in level, and older openings can be out of square. Clean results depend on fitting trim to those conditions, choosing profiles and materials that suit the room, and planning for the final paint or stain system. Well-aligned casing, consistent gaps around openings, tight corners, and paint-ready seams are the small details that make new trim look like it belongs.
Start at the floor when a remodel has changed the room’s proportions. Baseboards cover the wall-to-floor joint and establish a visual baseline around the perimeter; replacing a thin, dated baseboard after new flooring can make the entire update feel intentional. Shoe molding is the smaller quarter-round or base-shoe piece installed along the bottom edge of baseboard. It can neatly follow minor floor variation and finish a flooring edge without replacing the baseboard itself.
For an open living area, using the same baseboard height and a related casing profile across the kitchen, dining, and living zones creates continuity without making every opening identical. By contrast, mixing ornate crown with very plain, undersized casing can make the room feel visually unsettled. Interior trim installation in Osprey works best when each profile has a clear job: protect an edge, frame an opening, finish a transition, or connect adjoining spaces.
Good baseboard installation in Osprey also accounts for where flooring ends, where cabinets or stair trim begin, and how visible joints will be after paint. A simple, well-scaled profile with clean returns and consistent lines usually has more impact than decorative molding applied without a plan.
A blank wall can do more than separate rooms: it can become a focal surface, add useful storage, or give an otherwise simple space a stronger sense of order. Custom finish carpentry in Osprey is a good fit when standard baseboards and casing have done their job, but the room still needs an architectural feature that feels connected to the home.

For custom trim in Osprey, planning is what keeps a feature intentional rather than decorative for its own sake. A measured layout or wall mockup can establish panel sizes, shelf locations, TV or artwork placement, and how trim will meet adjacent doors and windows. It also helps identify outlets, switches, vents, and any electrical relocation before material is cut.
Before work begins, define the finish and scope in practical terms: whether surfaces will be paint- or stain-ready, whether painting is included, and whether built-in hardware, lighting, or electrical work belongs in the same project. That clarity lets the design stay focused on the room’s scale and everyday use, not just the initial visual impact.
Material choice changes both the look of the finished trim and the amount of tolerance it has for the room around it. Paint-grade MDF is a smooth, engineered option often selected for crisp painted profiles and consistent edge detail; it is generally positioned at the lower end of the material-cost range. Its clean face can make simple baseboards and casing look refined after paint, but a dent or damaged edge is less easily repaired than solid wood, and moisture-prone locations deserve a material chosen for that exposure.
Finger-jointed pine uses shorter wood sections joined into long lengths. It provides a paintable wood option with a more moderate price point, accepts small repairs more readily than MDF, and may be useful where a wood-based piece is preferred. Solid wood is usually the higher-cost choice, particularly when grain will remain visible. It can be shaped, patched, and refinished, making it the natural candidate for stain-grade woodwork, but it also requires allowance for seasonal movement. In Florida interiors, the practical distinction is the room: consistently conditioned spaces are different from utility areas, rooms with open exterior access, and locations beside baths or wet entries.
Rather than treating one material as best, compare samples alongside the planned paint or stain. Look at the sharpness of routed edges, how a nail hole or corner ding could be repaired, and whether the intended room is likely to experience changing humidity. A painted MDF casing may suit a quiet, conditioned bedroom, while a durable wood or moisture-appropriate alternative may make more sense where incidental dampness or harder use is expected.
Profile should carry the same logic. Clean square-edge and restrained craftsman trim profiles complement relaxed coastal or modern interiors because they create definition without visual clutter. Layered casing, crown, and base profiles introduce more shadow lines and can better relate to traditional doors, cabinetry, or existing ornamental millwork. Scale is the checkpoint: taller ceilings and broad openings can support wider casing or a built-up crown, while an oversized profile can make a compact room or narrow doorway feel compressed.
For trim installation Osprey FL homeowners can evaluate confidently, place a few profile samples against existing doors, flooring, and cabinet finishes before committing. The strongest selection relates to the home’s proportions and finish plan, not simply the largest profile on the sample board.
The close-up details are where trim either reads as intentional or merely attached. Careful layout begins by establishing level reference lines and matching casing margins, or reveals, the narrow, even band of door or window jamb left visible beside the trim. Consistent reveals make an opening look square and aligned even before paint draws attention to every edge.
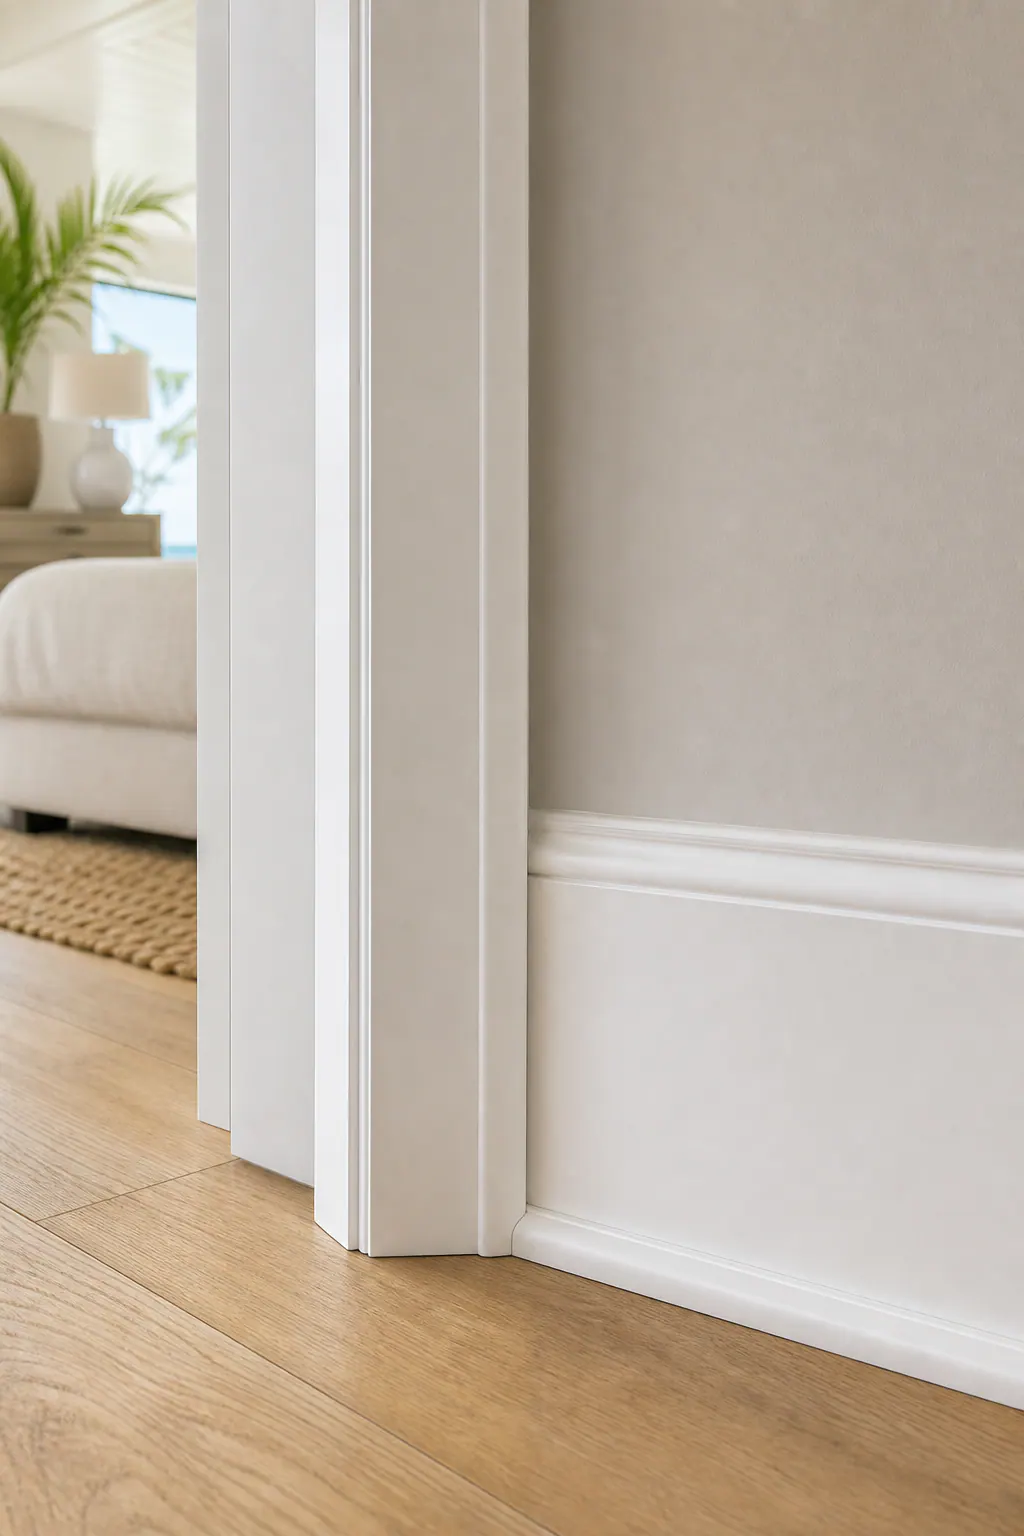
At outside corners, accurate miter joints create a continuous profile instead of a split, stepped seam. Inside corners often benefit from coping: one piece is shaped to fit the face of the adjoining piece rather than relying on two 45-degree cuts to meet perfectly. The practical payoff is a tighter-looking corner when a wall is slightly out of square. Fasteners should hold the trim firmly without leaving a row of conspicuous holes or pulling the profile out of line.
Remodel conditions deserve an honest look before cutting begins. Existing walls can bow, ceilings can dip, and a new floor may expose variation that old carpet or baseboard concealed. Scribe work means trimming the edge of a piece to follow an uneven surface, which can reduce shadow gaps along a wall or floor. A flexible shoe molding can accommodate minor floor variation; it cannot make a severely sloped floor appear level. Likewise, trim can soften modest irregularities, but it cannot hide water damage, loose drywall, or a substantially crooked opening without addressing the underlying condition.
In detail-driven finish carpentry Osprey FL homeowners should expect to see joints fitted before caulk is used, nail holes filled smoothly, and edges prepared for a clean paint finish. Caulk is useful for fine paintable gaps at a wall transition, not a substitute for poor cuts. Clarify whether the carpentry scope ends at paint-ready preparation or includes final priming and painting, since the finished sheen will make every seam and surface decision more visible.
A trim plan is easiest to price and execute when the room’s other finish decisions are visible first. Choose profiles while drywall repairs are being defined, then install after walls are sound and major cabinet, door, and flooring heights are known. Baseboards meet the finished floor, so changing from carpet to thicker tile or wood affects their bottom edge and any need for shoe molding. Casing is best coordinated with the final door jambs, while crown and wall treatments should be laid out before final painting.
Before requesting an Osprey FL trim installation estimate, make a simple room-by-room list: areas included, photos or style references, trim that stays versus trim to remove, finished-floor heights, and whether the plan is painted or stained. Note built-ins, paneling, and cabinetry too. A built-in may need baseboard to terminate into it; board-and-batten needs its rail height coordinated with outlets, windows, and furniture placement.
A useful written scope identifies the material and profile sizes, removal and disposal, drywall or wall repairs that affect fit, and whether the result is paint-ready or includes primer and finish paint. It should also distinguish fixed selections from allowances, which are placeholder amounts for undecided items, and explain how added rooms, concealed damage, changed profiles, or altered floor conditions are handled before extra work proceeds.
Bring the details that show how the room lives, not just the trim you like. Photos of walls, doors, windows, floors, and nearby cabinetry help frame the existing conditions; approximate room measurements and inspiration images make it easier to compare a quiet baseboard-and-casing refresh with crown, paneling, or more custom trim.
When you reach out about trim installation Osprey FL homeowners can describe which rooms are included, whether remodeling is underway, what stays in place, and whether the finish will be painted or stained. A close photo of an uneven wall, an out-of-square opening, or a flooring transition is especially useful because those are the places where fitting and finish decisions matter.
Detail-oriented residential finish carpentry can suit a single bedroom update as readily as coordinated improvements across connected living spaces. Share the direction you want, simple and tailored, softly coastal, or more architectural, and begin a practical conversation about baseboards, crown molding, casing, wall treatments, and custom finishing details.
Review the Osprey, FL service area for local planning context.
When you are ready, request a free estimate with the rooms, trim goals, city, and available photos.
Interior trim services include baseboards, shoe molding, door and window casing, crown molding, threshold transitions, and end caps. Custom finish carpentry can also include wainscoting, board and batten, picture-frame molding, coffered ceilings, built-ins, shelving, and benches.
Basic trim installation typically covers functional details such as baseboards, casing, crown, and flooring transitions. Finish carpentry also includes precise layout, scribing, coping inside corners, mitering outside corners, wall treatments, and custom assemblies such as built-ins.
Yes, trim can be fitted to modest wall, ceiling, and floor irregularities through scribing and careful layout. Shoe molding can follow minor floor variation, while coped inside corners help trim fit walls that are slightly out of square.
Choose clean square-edge or restrained craftsman profiles for a relaxed coastal or modern look, since they add definition without visual clutter. Match profile scale to the room: taller ceilings and wide openings can support wider casing, while compact rooms usually look better with simpler, narrower trim.
Paint-grade MDF provides smooth, crisp painted profiles and is generally at the lower end of the material-cost range, but damaged edges are harder to repair and moisture-prone rooms need more suitable materials. Solid wood costs more, supports staining, patching, and refinishing, and requires allowance for seasonal movement, especially where humidity exposure varies.
A crown profile has to look right at the line where the wall meets the ceiling.
Where the wall surface meets a door or window jamb, casing creates the finished border that conceals the transition.
Panel spacing, cap height, and the way trim meets a door casing determine whether the finished wall feels intentional or merely applied.
Custom feature walls turn a blank surface into part of the home's architecture rather than treating it as a backdrop for a new paint color.
Exterior trim repair starts with looking past the finish. Peeling paint, cracked caulk, soft spots, swollen joints, and gaps where window or door casing meets the wall can be visible clues that water is reaching places it should not.
Start with a visual checkpoint: a low-ceiling room can feel crowded beneath an oversized, layered crown assembly, while a simple profile can give it a clean, intentional finish.
Start with your city, rooms, trim goals, and any photos or drawings that can help clarify the work.